
NetObjects Fusion Tutorials
How to add an E-Commerce Catalog to your Website
Download this tutorial as a PDF
- Quick Navigation
Creating an E-Commerce Catalog
In this tutorial, you build an e-commerce catalog that includes products which will assist hikers on expeditions. Using the NetObjects Fusion E-Commerce Catalog tool, you can create an online store with products and descriptions that will match the style of your site.
To follow the steps in this lesson, you must have created the Mountain Jacques site described in Tutorial 1, Creating Your First Web Site. Download sample images here.
This tutorial shows you how to:
- Create a catalog
- Add products
- Add options
- Format the list page
- Format the detail pages
Adding Pages for the E-Commerce Catalog
Each catalog includes two types of pages: a list page, which displays all catalog items with a thumbnail image and summary of each product, and detail pages, which display one product to a page. You add the list page and NetObjects Fusion automatically adds the detail pages for you.
- Open the Mountain Jacques.nod site.
- Go to Site view.
- Select the Home page and add a new page.
- Name the new page Hiking Products.
- Change the MasterBorder to DefaultMasterBorder.
- Display the Hiking Products page in Page view.
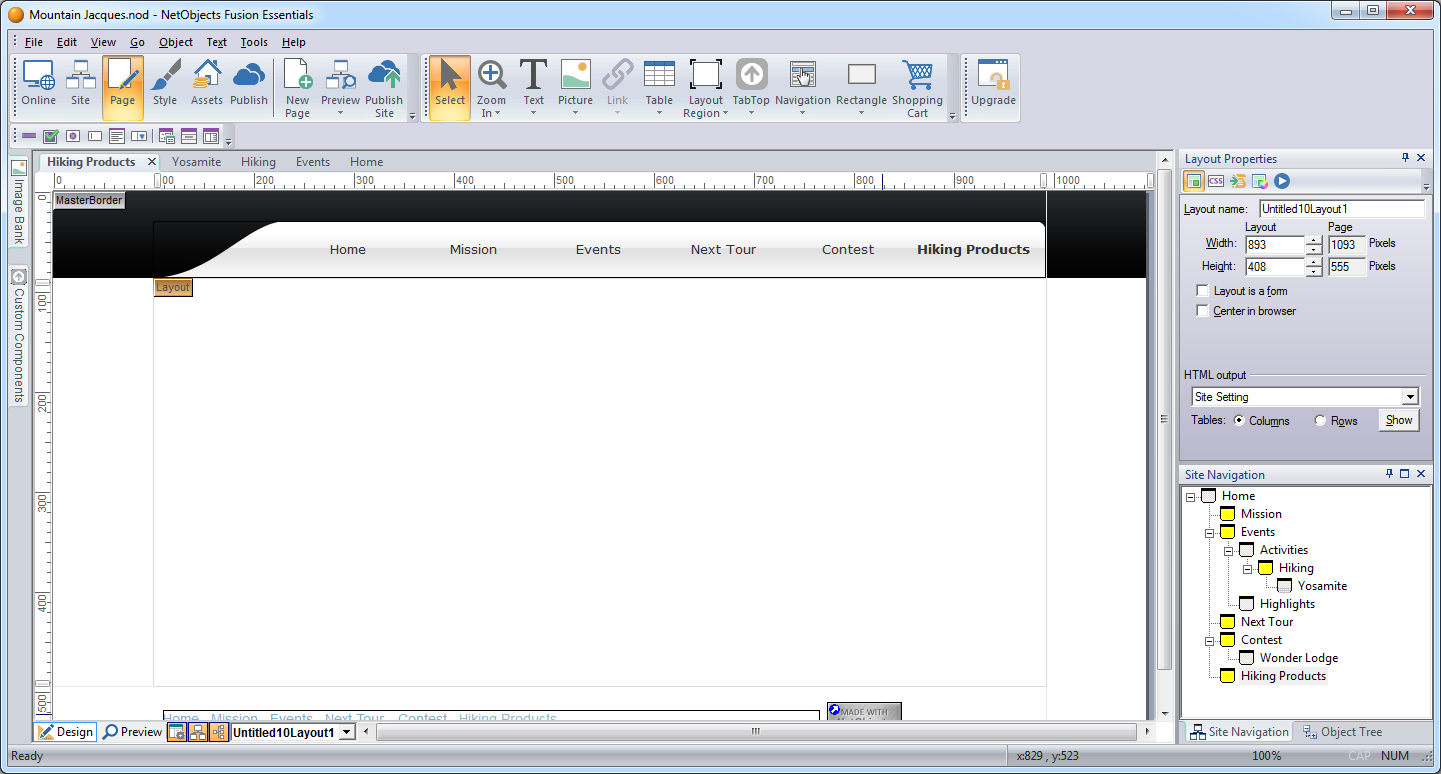
- Select the Shopping Cart tool from the Standard toolbar and click in the upper left corner of the Layout area.
It's a good idea to start in the upper left corner of the Layout to allow as much room as possible for the products. You can adjust the position later, if necessary.
- In the Add E-Commerce Catalog dialog, type Products as the name of the catalog and choose Use catalog without a store engine as your store.
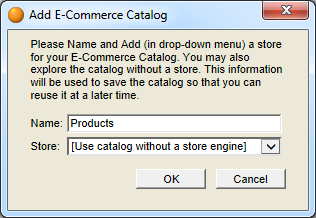
NetObjects Tip: If catalogs are already associated with the site, you may see a larger dialog. If this happens, use the Create a new E-Commerce Catalog option.
- Click OK.
Adding Products
Before you begin to add products, it's a good idea to organize the pictures you want to include into a single folder so you can find them easily.
After you add the catalog component, the next step is to add products. You should be looking at the Products tab of the E-commerce Catalog Properties Editor.
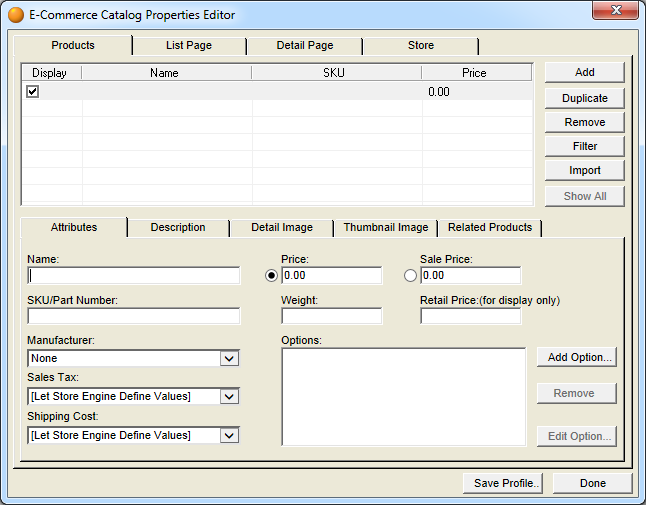
- Click on the Attributes tab if necessary.
- In the Name field, type in Fleece Jacket.
- In the SKU/Part Number field, type in MJ_01
- In the Price field, type in 59.99.
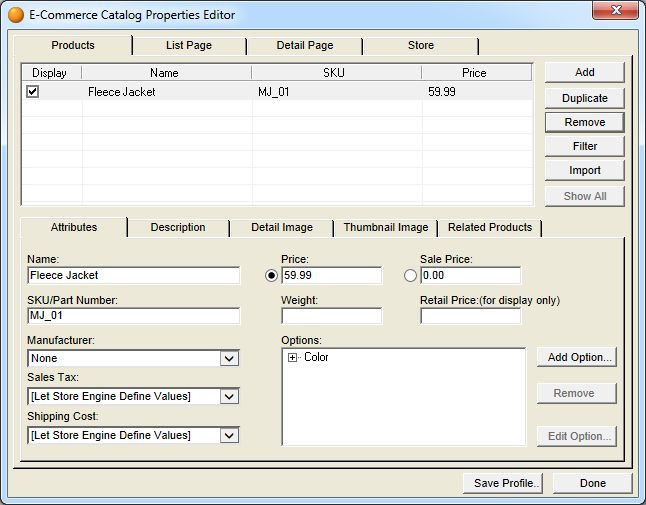
You can add product attributes such as size and color.
- Click Add Option...
- In the Group Name field, type Color.
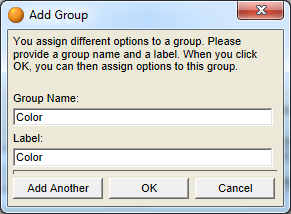
- Click OK.
The Edit Product Options dialog will appear. This is where you add specific attributes.
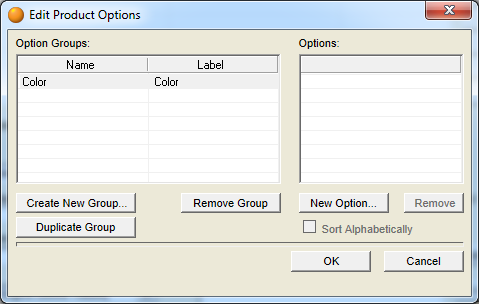
- Click on New Option and type in Green.
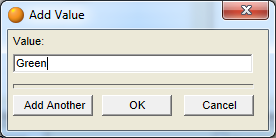
- Click Add Another and type in Blue.
- Click OK to close the Add Option dialog.
- Click OK to close the Edit Product Options dialog.
You can enter product descriptions to give your customers complete product information.
- Click on the Description tab.
- Enter the following text:
- For Brief Description, type Take the bite out of wind!
- For Extended Description, type Wear Mountain Jacques Designs Fleece Jacket alone or as a mid-layer to stay warm and cozy.
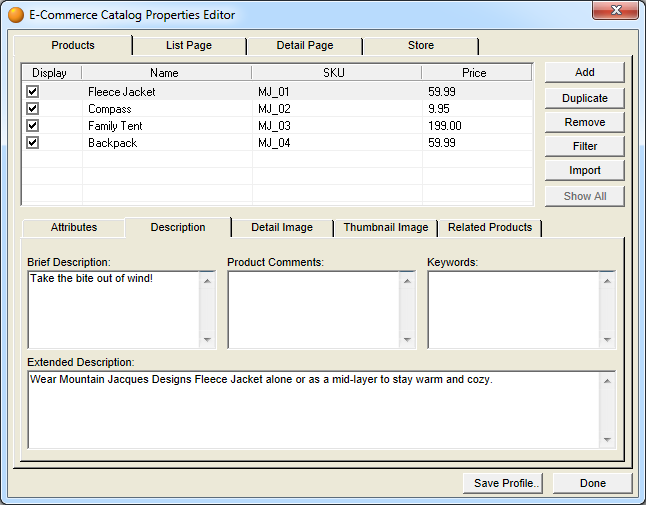
You enter product images on the Detail Image tab. This image appears as the thumbnail image on the List page.
- Click on the Detail Image tab.
- Click Browse to navigate to the Tutorial Docs\Catalog folder.
- Select fleece.jpg.
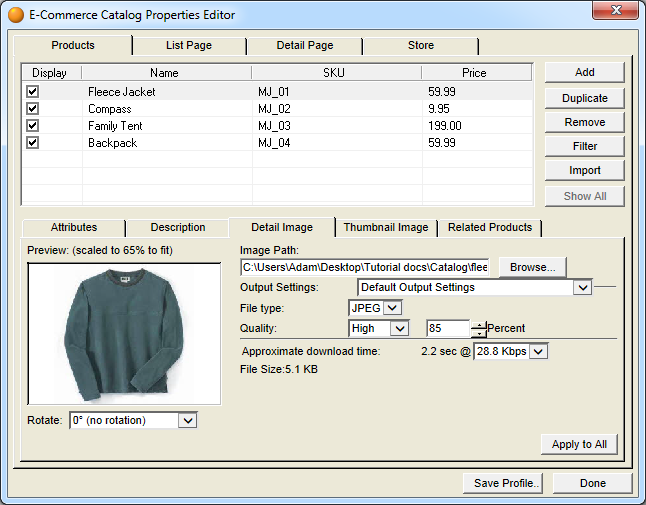
- Click Open.
You use the Output Settings on the Detail Image and Thumbnail Image tabs to balance display quality and download time so your site visitors are not waiting a long time for your photos to appear. For this lesson, the default settings are fine.
You can enter additional products by repeating steps 1 to 13.
- At the top right of the E-Commerce Catalog Properties Editor, click Add. The next line in the products list will be highlighted.
- Enter the Product 2 information listed below on the Attributes tab.
- Click Add and repeat the process for Product 3 and Product 4.
Next you set up formats for the List page and the detail pages.
Formatting the List Page
The list page shows a small preview of each product in the catalog. Site visitors click a thumbnail to go to the detail page.
- Click the List Page tab.
- On the Layout tab, select a layout.
- Click the Display Items tab.
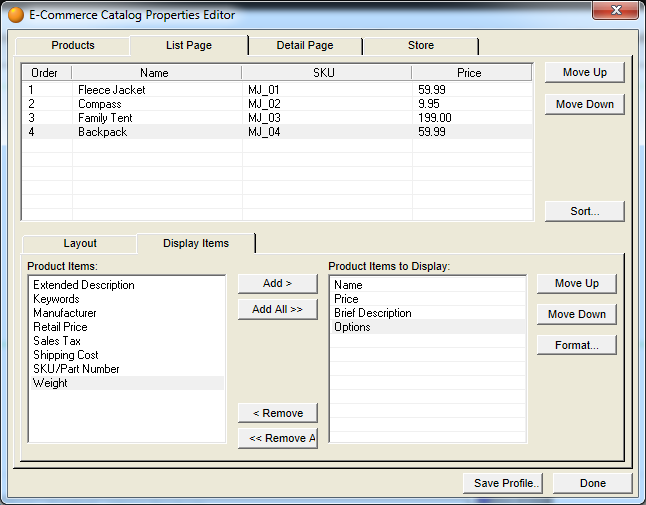
- In the Product Items to Display column, highlight Name and click Format.
The Format Name dialog appears.
The label formats you select here apply to the List page only.
- Delete the text Name and enter Item as the label name.
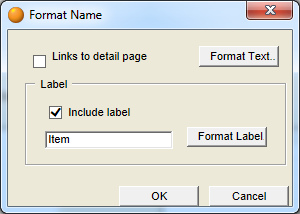
- Click Format Label.
The Object Format dialog appears.
The text formats you select here for the labels apply to the List page only.
On the Character tab, set Font to Arial, Style to Bold, and Size to 16px, then click OK to return to the Format Name dialog.
- Repeat Step 4 for the remaining Product Items to Display.
The label names should be Price, Description and Options.
- Click OK when you have completed the step above.
- Click Done to see the List page.
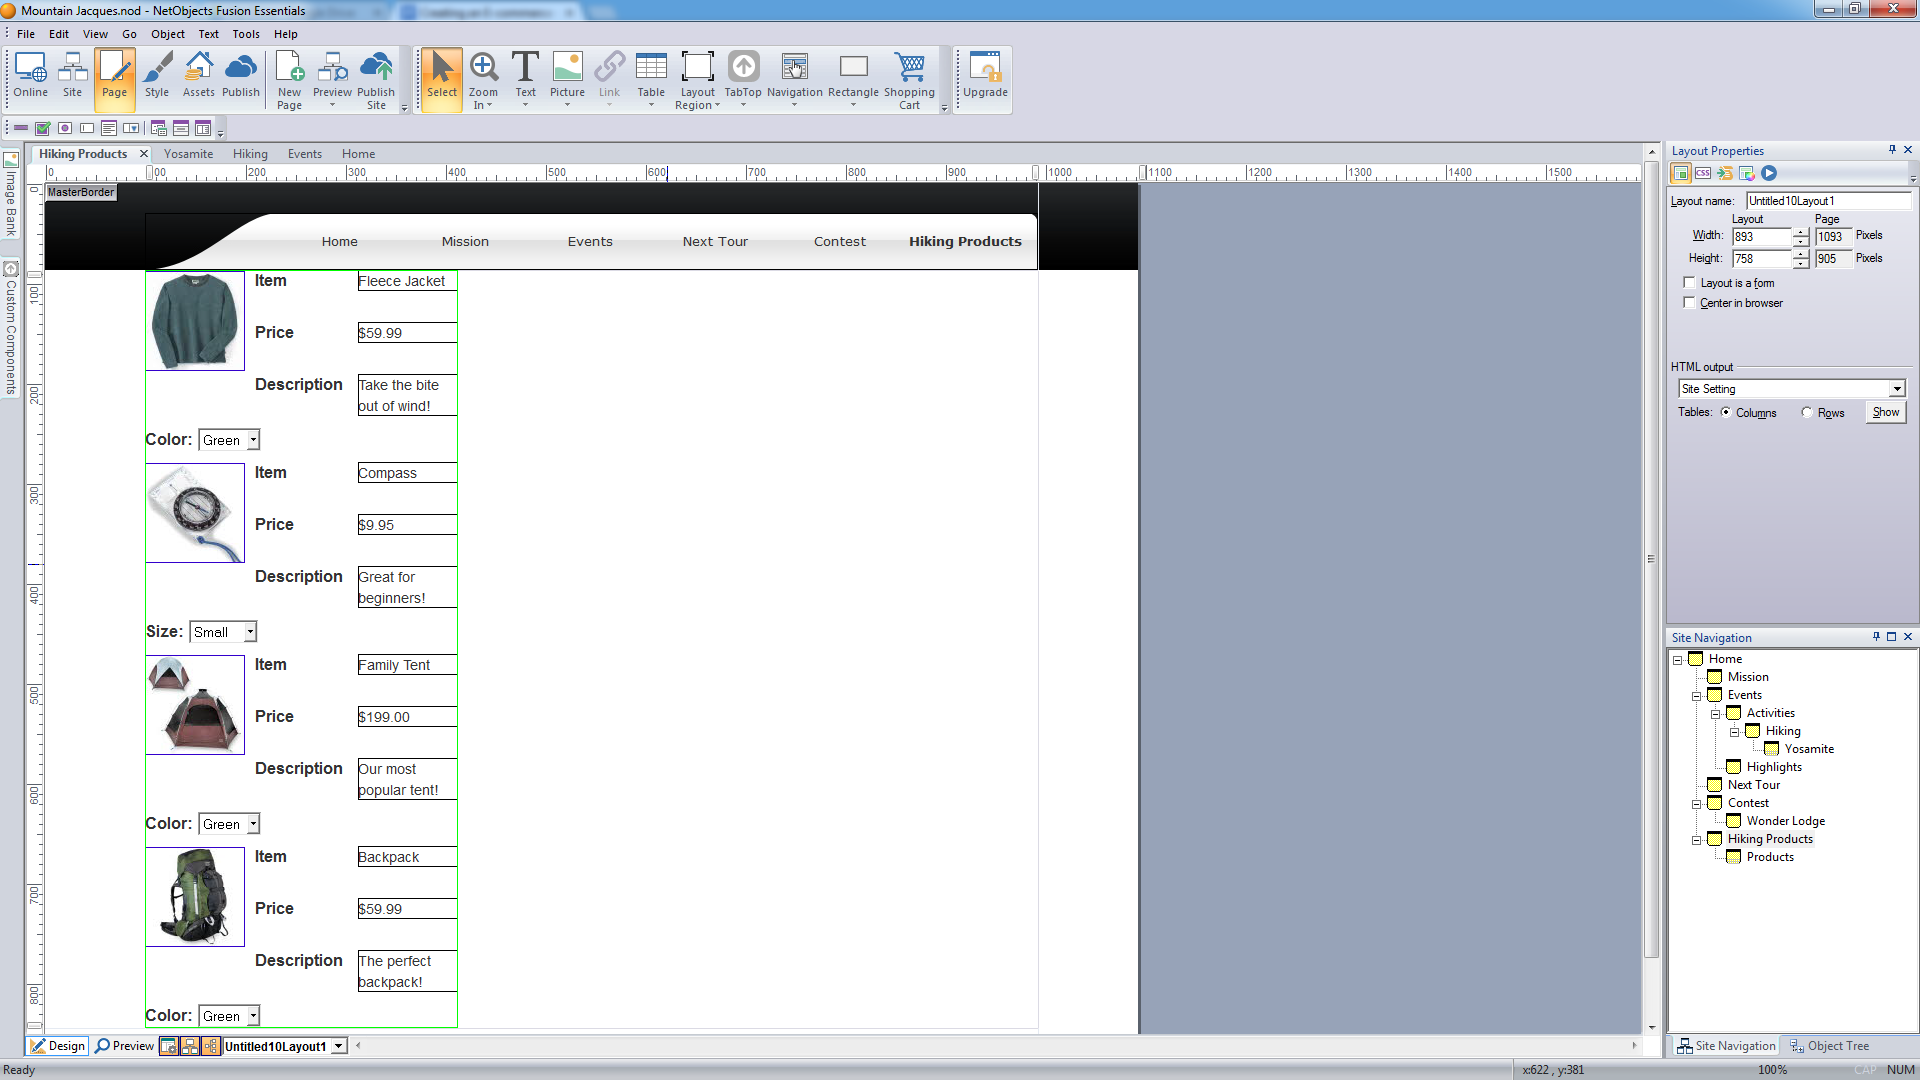
The thumbnails are bounded by a green border. You can change size of the images within the green border, but you cannot edit product information or change dimensions within the border.
- Drag the catalog so it is centered in the page.
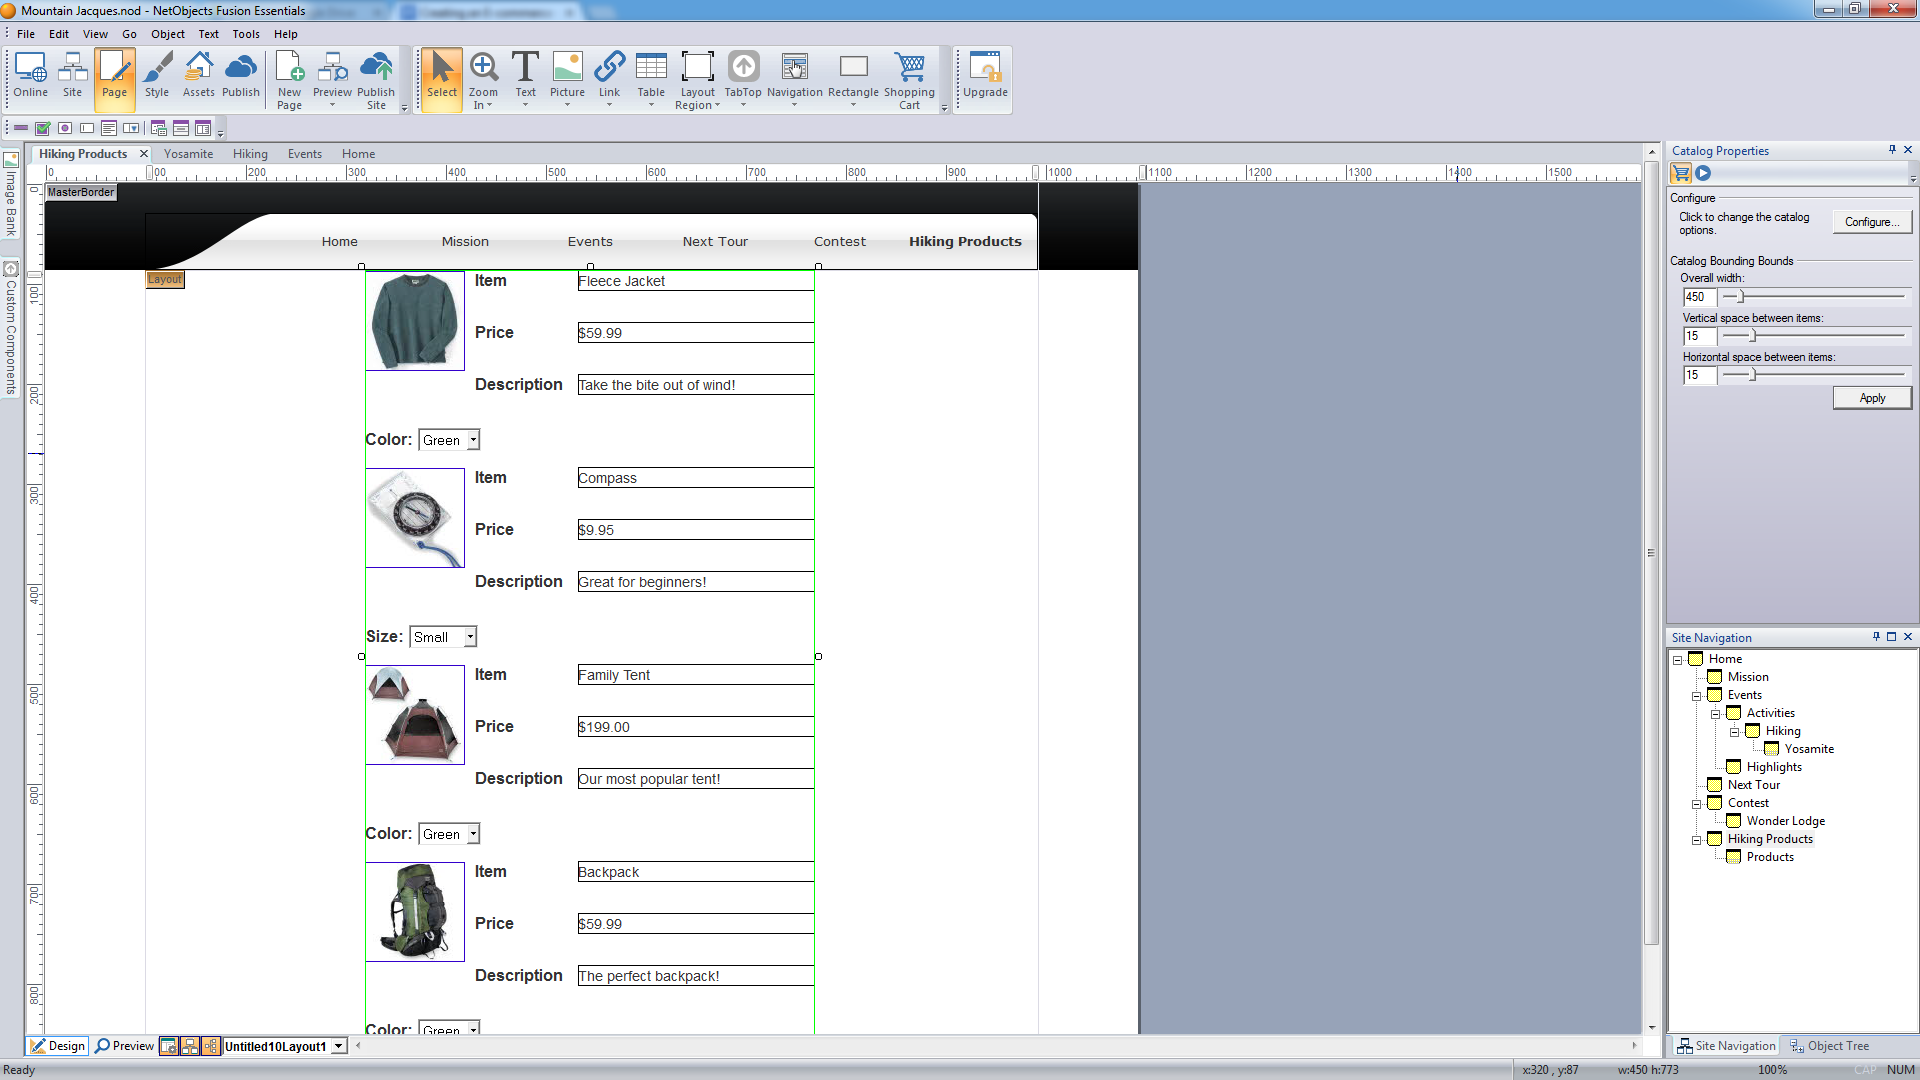
- In the Properties Palette, make Overall Width 450, Vertical Space between items 15 and horizontal space between items 15.
- Click Apply.
- On the Catalog Properties Palette, click the Configure button to return to the ECommerce Catalog Properties Editor.
Formatting the Detail Pages
Each detail page can contain an image and specific information about a product such as price and part number. The layout and text formats you select on the Detail Page tab are reflected on all detail pages. Changes you make directly on a detail page apply only to that page.
- Click the Detail Page tab.
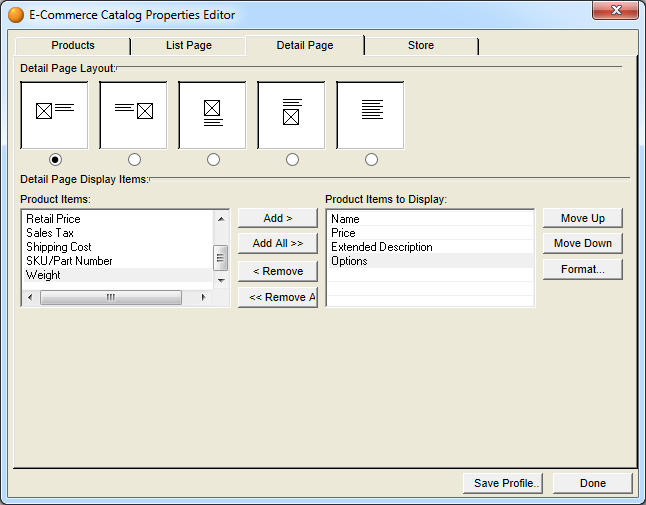
- Select a Layout.
The pictures in this guide use the default layout, but you can experiment with other layouts.
The layout you select applies to all detail pages.
NetObjects Tip: When selecting a layout, consider the shape of your photos and the amount of text you want to include in the caption.
- Under Product Items to Display, highlight Name and click Format.
The Format Name dialog appears.
The label formats you select here apply to all detail pages.
- Delete the text Name and enter Item as the label name.
- Click Format Label.
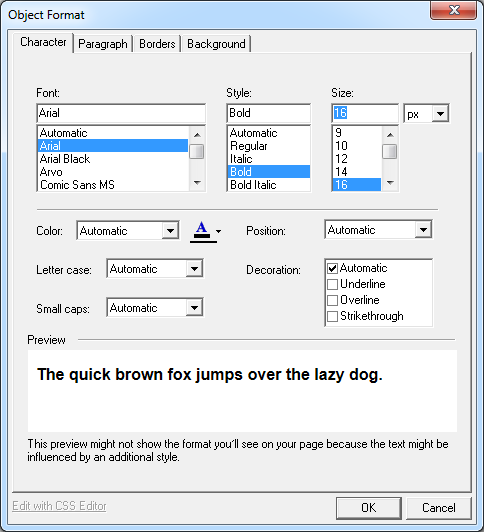
The Object Format dialog appears.
The text formats you select here for the labels apply to all product detail pages.
On the Character tab, set Font to Arial, Style to Bold, and Size to 16px, then click OK to return to the Format Name dialog.
- Repeat Step 4 for the remaining Product Items to Display.
The label names should be Price, Description, and Options.
- Click OK when you have completed the step above.
- Click Done to close the E-Commerce Catalog Properties Editor.
You use the Save Profile option at the bottom of the E-Commerce Catalog Properties Editor to save the settings associated with a specific catalog so it can be used for the next catalog created. For this lesson, we will not create a profile.
Look at the Site Navigation palette. NetObjects Fusion added a page named Hiking Products to the site. The new page icon shows multiple pages and has the same name as the catalog. This icon represents the detail pages. The actual number of pages adjusts to accommodate as many or as few products as you add to the catalog.
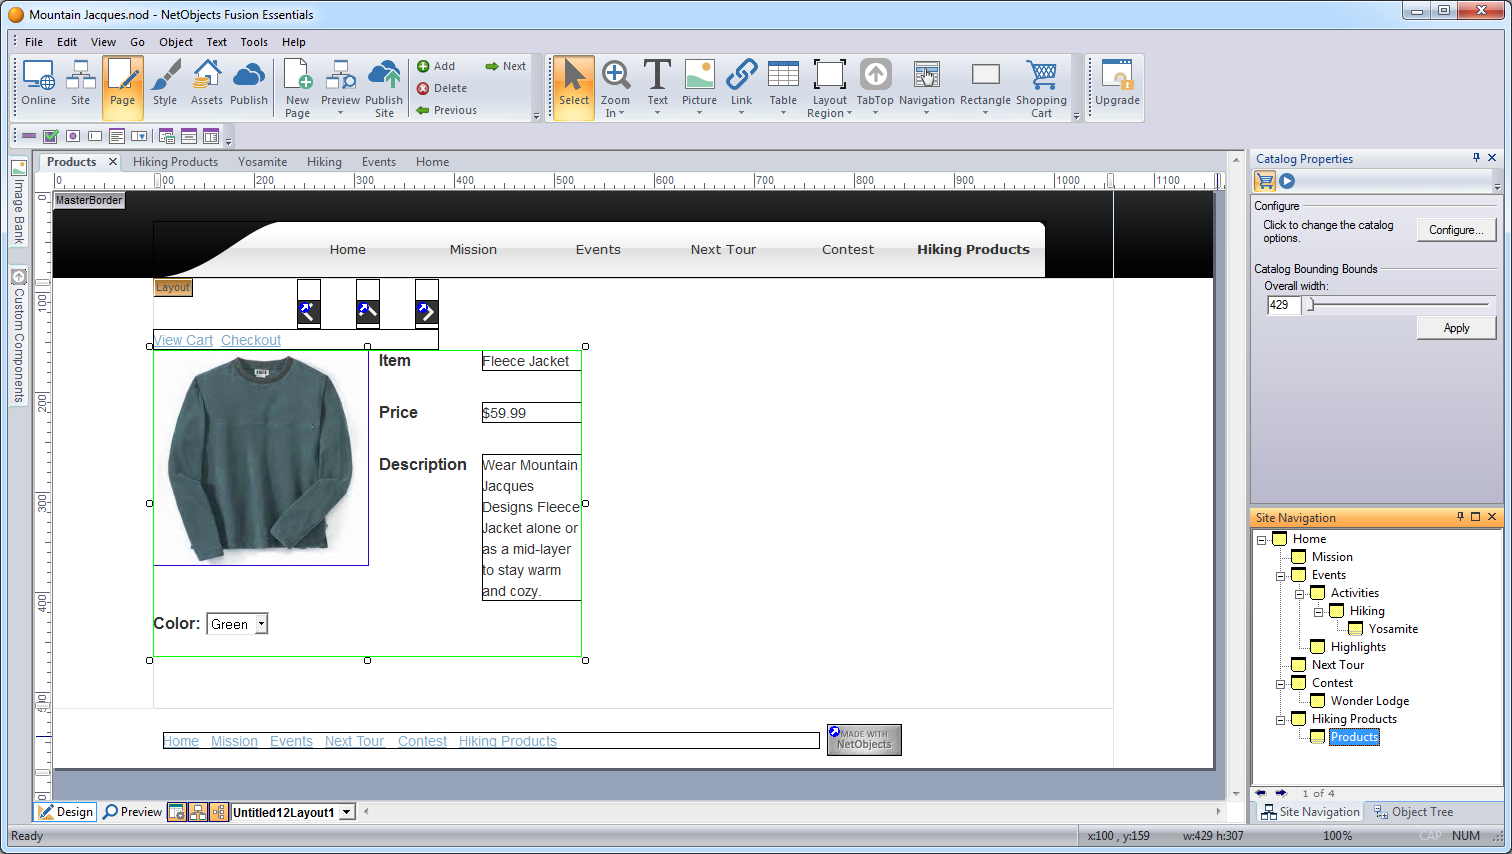
- Double-click the detail page icon on the Site Navigation palette.
The first detail page appears.
You use the navigation buttons on the control bar to move to the next and previous detail pages, and to add or delete a page. The three navigation buttons below the banner provide a way for site visitors to move to the next or previous product, or back to the thumbnail page.
- Click the Next and Previous buttons to display each product page.
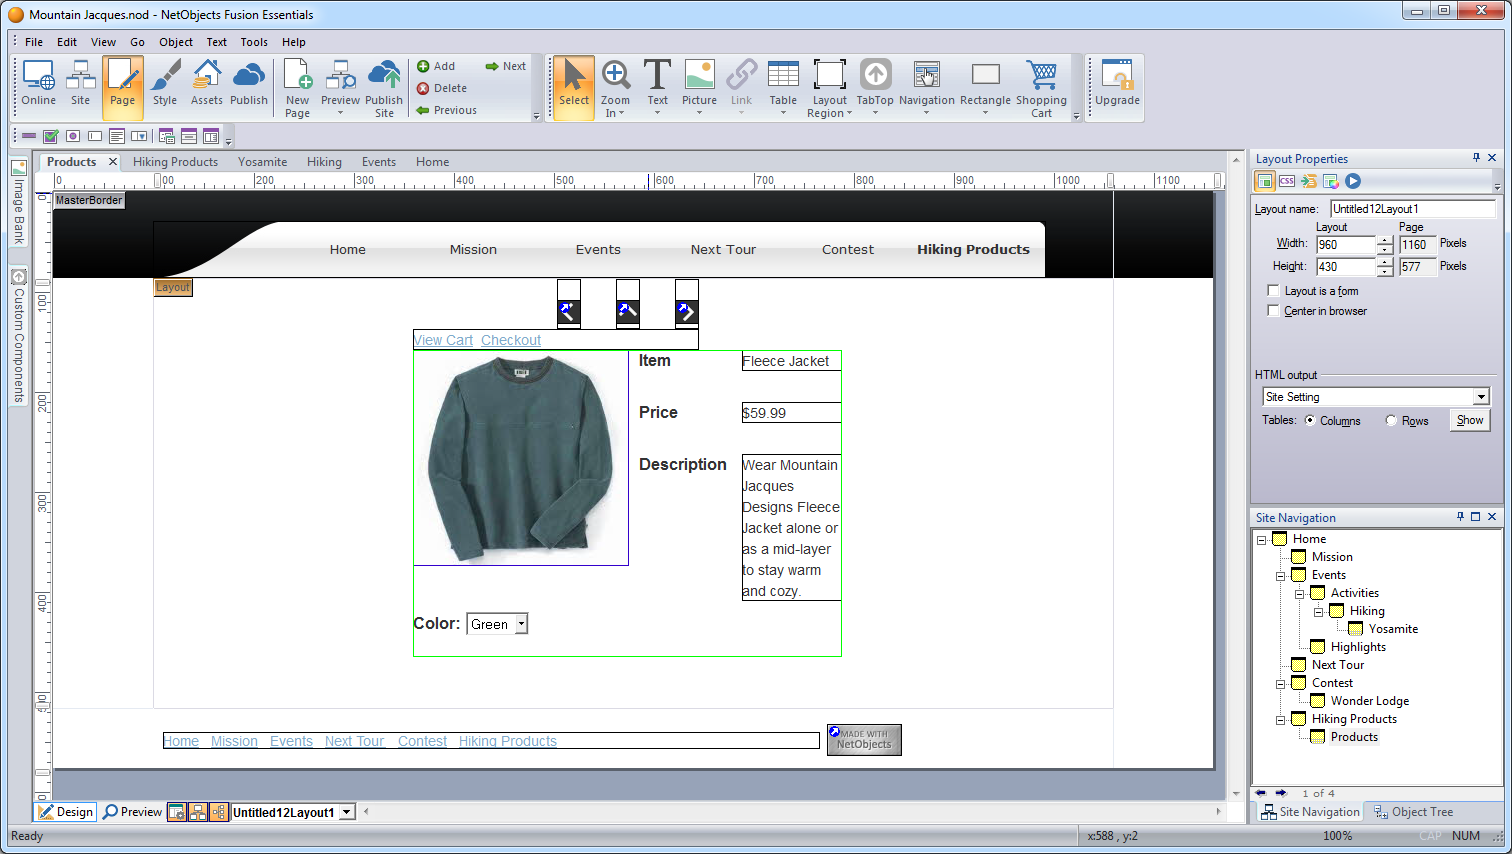
- Press Shift and click the catalog and each navigation button to select all of these objects.
- Press the right arrow key to move the selected objects so they are centered under the banner.
This centers the objects on all photo pages.
- Click the Next button on the control bar to move to the Compass detail page.
- Preview the site.
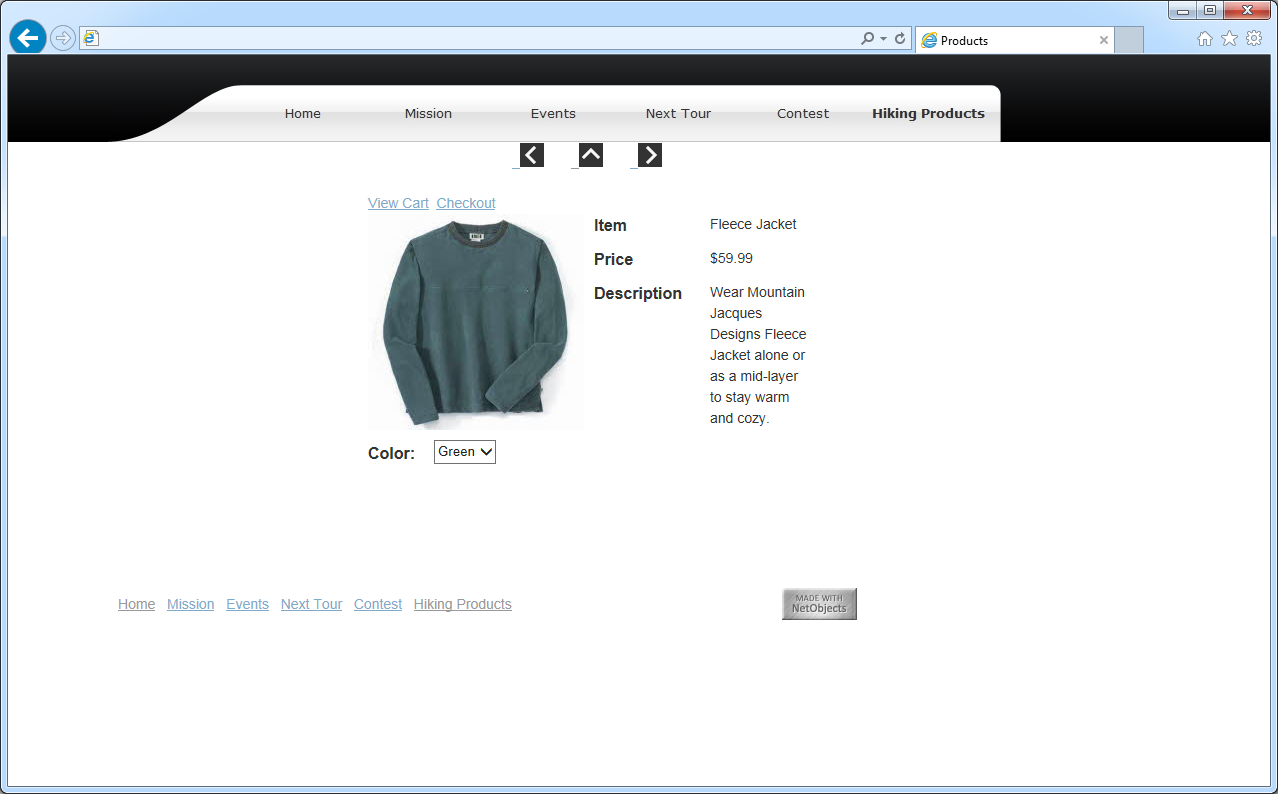
- Click the up arrow to return to the List page and then click an image to go to the detail page. Use the left and right arrows to move between detail pages.
Your catalog is complete.
Where To Go From Here
You just learned how to put your products on the Web using the NetObjects Fusion Catalog tool. If you enjoyed using NetObjects Fusion , consider the benefits of stepping up to NetObjects Fusion 15! With our latest award winning software you will be able to even more. Find out about our special exclusive offer to upgrade to Fusion 15. More Info.